How I Teach Factoring Quadratics


Using this method to teach factoring quadratics has helped my algebra students so much!  There are no tricks! This works with any lesson and is easy for teachers too.

I know of a few different methods people use to teach factoring, but I’ve never been a fan of the “fancy” methods.  They just don’t work for me.  When I teach factoring, I actually teach the unit backward.  I teach factoring by grouping, factoring trinomials when a≠1, factoring trinomials when a=1, then special cases.

I start with factoring by grouping, because once students can do that, factoring trinomials is easy.  I tend to spend an extra day teaching factoring by grouping.  When students have that down, I move on to factoring trinomials.  I prefer teaching when a≠1 first, because when a=1 is really just a special case.  If students can handle the “harder” version, there almost isn’t a need to teach the “easier” version.
So, this is how I teach factoring.  This is not revolutionary.  It is not new, or even interesting.  But it works, every time.  I've often heard this method called "splitting the middle".

First, I have students multiply the “a” value by the “c” value.

How I Teach Factoring Quadratics
Then, I tell them they are looking for two numbers that multiply to that value.  I have them make a list.

How I Teach Factoring Quadratics

Only after that do I have them find the pair of numbers that adds to the “b” value.

How I Teach Factoring Quadratics

Next, I have students split the middle and finish by factoring by grouping.  So, example student work for the example would look like this:

How I Teach Factoring Quadratics

I prefer to teach factoring this way because it doesn’t rely on tricks and it works every time.  Also, after this lesson, teaching a=1 is just a special case.

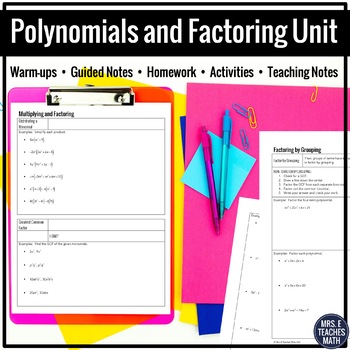
In my TpT store, I have a full unit with activities to teach polynomials and factoring.  The unit includes guided notes, worksheets, warm-ups, activities, and other materials to effectively teach your students. Click to find my Polynomials and Factoring Unit.


Related Items:


Pythagorean Theorem INB Pages

I had fun teaching the Pythagorean Theorem this year!  My students still didn't love having to simplify the radicals, but they'll get used to it.  In middle school they are allowed to get a decimal for all radicals.  It's a hard adjustment for them!

First, I had my students write the Pythagorean Theorem in their notebooks.  Then, I used the pink foldable to help them with the steps to find the missing sides of triangles.  I found this idea from Mrs. Atwood's Math Class.  In the original, students wrote on the flaps and drew their own triangles.  I prefer to have things printed, so I made one.

the Pythagorean Theorem foldable and lesson idea for interactive notebooks in high school geometry

the Pythagorean Theorem foldable and lesson idea for interactive notebooks in high school geometry

Next, I gave my students a table of the Pythagorean Triples.  I had them work with their partners to fill in the table.  We worked the two problems at the bottom together once they had completed the table.

the Pythagorean Triples idea for interactive notebooks in high school geometry

After that, I used my Pythagorean Theorem Word Problems Task Cards.  I used the "multiple page" option on the printer to print 4 pages to 1.  Each student got 4 problems to work in their notebooks.

Pythagorean theorem word problems interactive notebook activity for geometry - using task cards in interactive notebooks

The next day, I used my Pythagorean Theorem Converse Foldable to teach about classifying triangles.  Each flap as two practice problems underneath.  I didn't do very much with the rest of the page.  I might include more practice problems or something next year.

Pythagorean Theorem Converse Foldable - classifying triangles in high school geometry

Then, I had my students do a Classifying Triangles Card Sort.  They wrote the rule in each category as well.

Pythagorean Theorem Converse Card Sort - using card sorts in interactive notebooks for high school geometry

I liked the way these lessons turned out.  My students understood everything, but still struggled with the radicals.  I'm really working on improving their algebra skills.

Writing a Function Rule Graphic Organizer

When I taught my students how to write a function rule, I used this graphic organizer.  It was really just an interesting way to organize the different problems instead of listing them down the page.  There are 5 examples where students write the function rule from a table.  Then, there are 2 examples that are word problems.

Writing a Function Rule Graphic Organizer - for algebra interactive notebooks


On another note, my students have been really starting to decorate their notebook pages.  These two examples are my students notebooks that they decorated while I was teaching the lesson.  I love that they are making it their own!

Writing a Function Rule Graphic Organizer - for algebra interactive notebooks


Slope INB Pages

Ahhh, slope.  I was afraid that slope was going to be boring in Algebra 1 (since they did it in Pre-Algebra), but it was super fun!

First, I showed the video of Slope Dude.  If you haven’t seen it, let me tell you that it is very dry and boring.  I prefaced it for my students as “the lamest, but weirdly coolest video you will see today”.  Once they saw it, they understood.  

Then, we completed this page from Math=Love about finding slope from a graph.  I made them tell me what slope dude says for each graph.  I repeated it after them too.  I was trying to get them to hear/say it so many times that it was annoying and ingrained in their brains forever.  It totally worked.  They now say "niicee negative" and "This is zero fun." for everything.  Yay.

Finding Slope from a Graph INB Page

Then, I focused on interpreting slope.  This page idea is from Math=Love as well.  I made my students write out the entire sentence for each example in the booklet.  I also made them write out this full sentence on their test.

Interpreting Slope INB Page

The next page was finding slope from two points.  I quickly typed up this page (there isn’t much to it).  I showed them two ways of finding the slope.  First, I told them they could label each number and substitute each value into the formula.  We did the first two examples that way.  Then, I told them that they could just subtract the x’s and y’s.  We did the second two examples that way.  I highlighted the x’s and y’s so that they could visually see them together.  My students much preferred the second method (I do too!).  However, I try to always give the formula or rule to give a choice.

finding slope from two points interactive notebook page for algebra

After that, my students did two activities in their notebooks for practice.  First, they did my calculating slope puzzle.  The point isn’t that students do every single problem in the puzzle.  They will figure out that the stars outline the outside pretty quickly.  However, they still need to find the slope of several pairs of points to make sure they are in the correct order.

Calculating Slope Puzzle - finding slope from two points, for interactive notebooks

Then, I used my slope card sort.  There are six slopes and students sorted the pairs of points into the correct category.  I made sure to include slopes of zero and undefined, because I know students have trouble telling those apart!

Finding Slope from Two Points Card Sort - used in interactive notebook for algebra
I will be spending for-ev-er on equations of lines.  I hope to have some great pages of those to share too!


Altitudes and Angle Bisectors Paper Folding Activity

I posted awhile ago about how I used paper folding to help my students discover the Triangle Midsegment Theorem. Then, I had my students glue their folded triangles into their interactive notebooks.  I had them fold altitudes, and angle bisectors as well.  

Altitudes

I pre-cut obtuse triangles, right triangles, and acute triangles.  It didn’t take me very long.  I pretty much just hacked at a stack of paper.  I passed them out and told students to fold the triangle so that a side overlaps itself and the fold contains the opposite vertex.  At this point, I had only given students the definition of an altitude.  

Discovering Altitudes in Triangles by Paper Folding

Then, I had them open up their fold and draw the line that they had drawn.  I asked them if they noticed anything interesting about the line.  Someone noticed that it was perpendicular, and so we included the right angle on the triangle.  I also had them try to fold the altitude for the other sides.  Some of them had trouble, and we talked about how the altitude can be outside or inside the triangle.  

Discovering Altitudes in Triangles by Paper Folding

Angle Bisectors

Again, I pre-cut obtuse, right, and acute triangles.  I gave each student a triangle (they were all different).  I told them to fold the triangle so that the opposite sides meet and contain the vertex.  

Angle Bisectors in Triangles Paper Folding Activity

I had them do this for each of the angles in the triangle.  Once they were finished, I had them trace all of the folds they had made.  Then, they marked the point of concurrency.  

Angle Bisectors in Triangles Paper Folding Activity

Paper folding this way was an interesting way to think about constructions, without actually doing constructions and using protractors and compasses, etc.  I will do this again next year.  I thought about having pre-made samples to show students to make the activity go faster, but I think some of the discovery would then be lost.